This project began independently, before I had formally connected this kind of work to engineering as a career path. In hindsight, it reflects the type of work I naturally gravitate towards: diagnosing problems, working within constraints, and improving existing systems rather than replacing them. It also reflects the kind of work I now actively seek to develop further.
I refurbished a 7th generation iPod Classic by replacing the original hard drive with flash storage, installing a new battery, restoring the external housing, and cleaning internal components. The result was a fully functional device with improved reliability and longevity, achieved at a cost below typical refurbished market prices.
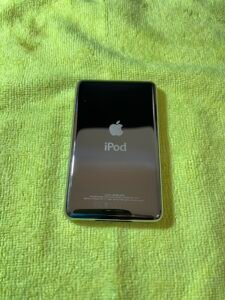
Refurbished front assembly following flash storage conversion and battery replacement
Restored rear housing replacing the original worn and dented back plate
Context
At the time of the project, iPod Classics were experiencing a resurgence in popularity. Market pricing generally fell into three categories:
Around $100 AUD for used, un-refurbished units
Around $300 for refurbished units
Wide variation in condition and reliability
I sourced my unit for $49. However, its condition reflected the lower price point. The device had a strong odour, visible residue inside the casing, and significant wear to the back plate. The internal hard drive—one of the most common failure points in these devices—was also still in its original state.
Rather than treating these issues as defects to avoid, I approached them as constraints to work within.
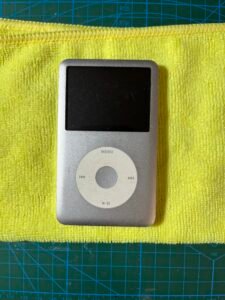
Original front condition prior to refurbishment
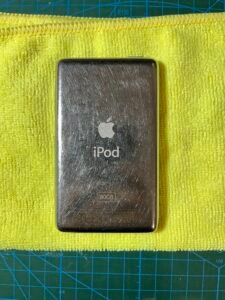
Original back plate showing typical wear, including scratches and deformation
Problem Definition
The refurbishment required addressing several distinct but related issues.
The original storage system relied on a mechanical hard drive. These drives are prone to failure over time, particularly in portable devices subject to movement. They also consume more power than modern alternatives.
The battery had degraded to the point where the device was no longer practically usable for extended periods.
Externally, the casing showed clear signs of wear, including scratches and deformation of the back plate. While cosmetic damage is common in iPod Classics, it also affects the overall usability and structural feel of the device.
Internally, a crusty, sticky residue was present, particularly around the hard drive and along the interface between the front and back plates. This introduced potential long-term reliability concerns if left unaddressed.
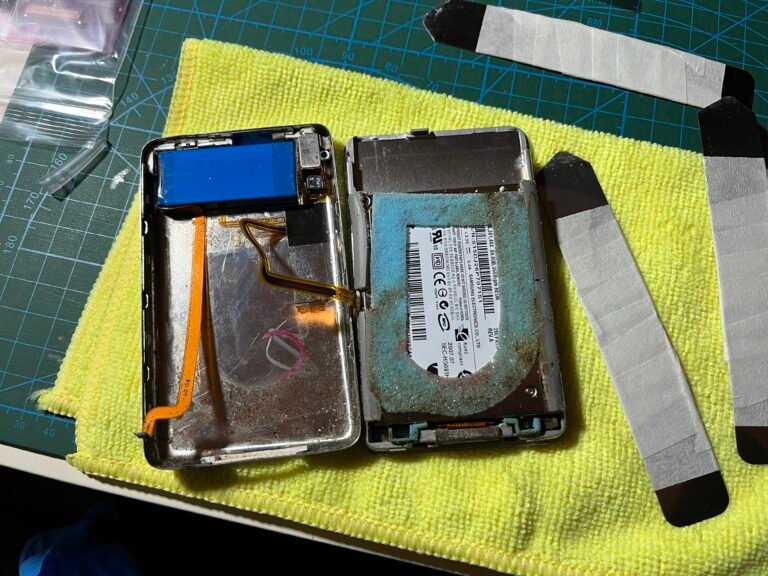
Internal components prior to cleaning, with visible residue and original hard drive installed
Engineering Approach
Flash Storage Conversion
The most significant modification was replacing the original hard drive with an SD-based flash storage solution. This required selecting a compatible adapter and ensuring it fit correctly within the existing internal layout.
This change eliminated all moving parts from the storage system and reduced power consumption, while also allowing for flexible storage capacity depending on the SD card used. The decision prioritised long-term reliability over maintaining original hardware.
Power System Replacement
The battery was replaced to restore practical usability. This involved selecting a compatible unit that fit within the limited internal space, particularly given the new storage configuration.
Restoring battery performance was essential not just for convenience, but for making the device viable as an everyday system rather than a purely restored object.
Mechanical Restoration
The external components—including the front plate, back plate, and click wheel—were replaced. While this improved the visual condition of the device, it also had functional benefits.
A structurally sound enclosure improves durability and handling, and a responsive click wheel is vital to the usability of the iPod interface. These changes therefore supported both form and function.
Logic board and internal layout during disassembly, including click wheel interface area
Cleaning and Internal Restoration
The internal cleaning process focused on removing residue without damaging sensitive components. Particular attention was given to connectors and contact points, where contamination could affect performance or cause issues over time.
This stage was less visible than the hardware replacements but equally important in ensuring the long-term reliability of the device.
Flash storage adapter and new battery installed, replacing the original mechanical hard drive
Cost Analysis
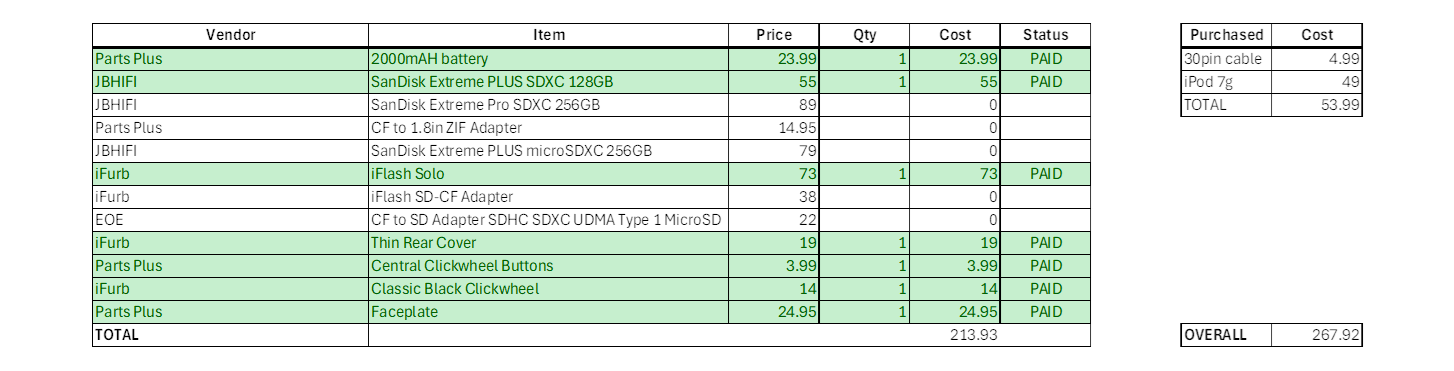
One of the more structured aspects of this project was tracking cost and evaluating trade-offs between different component options.
iPod: $49.00
Charging cable: $4.99
Parts: $213.93
Total: $267.92 AUD
For comparison, refurbished iPod Classics at the time were typically priced around $300.
This project resulted in a device that was both less expensive and technically improved in key areas.
All costs and part options were tracked in a spreadsheet, including alternative components that were considered but not selected. This made decision-making more explicit and allowed trade-offs to be evaluated rather than assumed.
Trade-offs and Decisions
The project involved balancing multiple competing factors, including cost, reliability, and effort.
For example, converting to flash storage increased upfront cost but significantly reduced the risk of future failure. Similarly, replacing the full external casing improved usability and durability, even though it was not strictly necessary for functionality.
This approach—evaluating decisions based on practical constraints rather than ideal outcomes—is consistent with how I approach other topics, including in my writing on trade-offs in learning methods.
Documentation and Process
The refurbishment process was documented through:
Before images of the device
Internal component condition prior to cleaning
Installation stages for new components
Final assembled result
Documenting both process and outcome is something I’ve continued to develop, including in my virtual photography work, where the relationship between tools, environment, and final output is equally important.
Outcome
The final device is fully functional and significantly more reliable than its original configuration. The transition to flash storage removes a major point of failure, while the new battery restores practical usability.
Externally, the device has been structurally and cosmetically restored, resulting in a product that retains the original experience of the iPod Classic while improving its underlying performance.
More broadly, the project demonstrates the ability to take an imperfect starting point and develop it into a functional and considered final system.
Reflection
Looking back, this project aligns closely with how I now approach both technical and creative work. The focus is not just on outcomes, but on understanding systems, working within constraints, and making deliberate decisions throughout the process.
That same mindset carries through into my writing, including my exploration of how tools and definitions evolve in areas like virtual photography.
What This Project Demonstrates
Hardware-level troubleshooting and modification
Cost analysis and optimisation
Evaluation of engineering trade-offs
Mechanical disassembly and reassembly
Process documentation and structured thinking
Final Note
This project was completed independently and reflects an early example of the type of problem-solving approach I continue to develop.