I didn’t start learning CAD in a classroom. I learned CAD through curiosity and experimentation on an iPad using the Apple Pencil.
Back in Year 8 (2017), I had just gotten a first-generation iPad Pro and the Apple Pencil. At the time I mainly used Procreate, but I was curious about what other apps were designed for the Pencil. While browsing the app store, I came across Shapr3D.
Unlike most apps at the time, it wasn’t just a drawing app. It’s a full 3D CAD program built on the Siemens Parasolid engine and it required the Apple Pencil to use. This made it feel like real engineering software rather than just a casual app.
I went through some of the basic tutorials, but most of my learning came from experimenting. Occasionally, I would open the app and try to model simple objects. There wasn’t much structure to it, so I was just learning by doing.
Getting Started with CAD Using Shapr3D (Beginner Phase)
My first experience learning CAD was unstructured but important for my learning.
Using Shapr3D on and iPad with the Apple Pencil made sketching and modelling in 3D feel intuitive. Even though I wasn’t following a formal course, I was able to build familiarity with core CAD concepts like sketching, extruding, and shaping geometry.
This early exposure made later learning much easier, especially when I started taking on more structured engineering projects.
My First Real CAD Project: Designing a Monitor Riser
I returned to Shapr3D around 2023-2024, this time on my Mac, with the specific goal to design a desk shelf to raise my monitor.
This was the first time I used CAD to create something practical. I modelled the shelf with the intention of building it out of wood and was able to experiment with assigning materials and adjusting their visual appearance, which gave me a basic introduction to rendering.
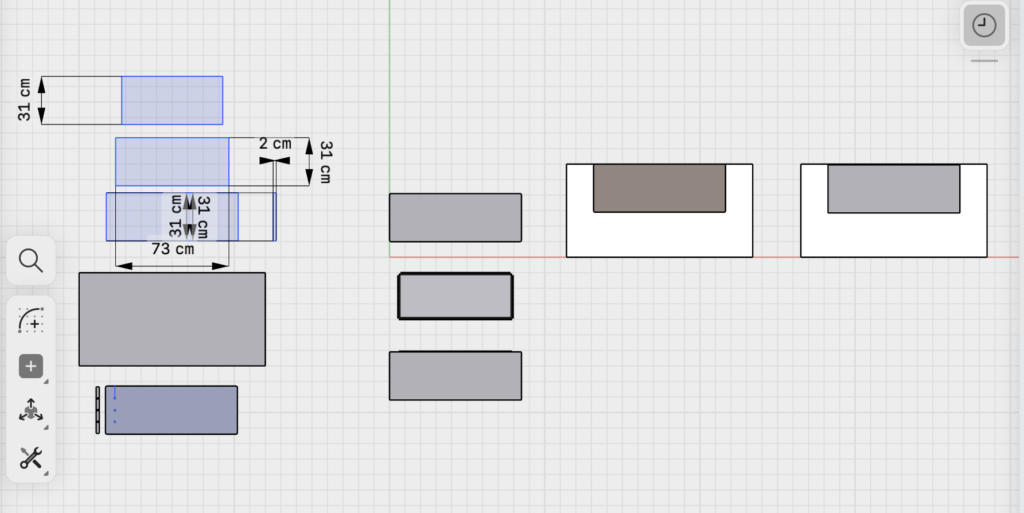
I modelled the monitor riser in a 2D plan view and 3D, and used dimensions to test proportions and ensure it would fit my desk.
Early Shapr3D workspace showing top-down layout and dimensions used to plan the monitor riser.
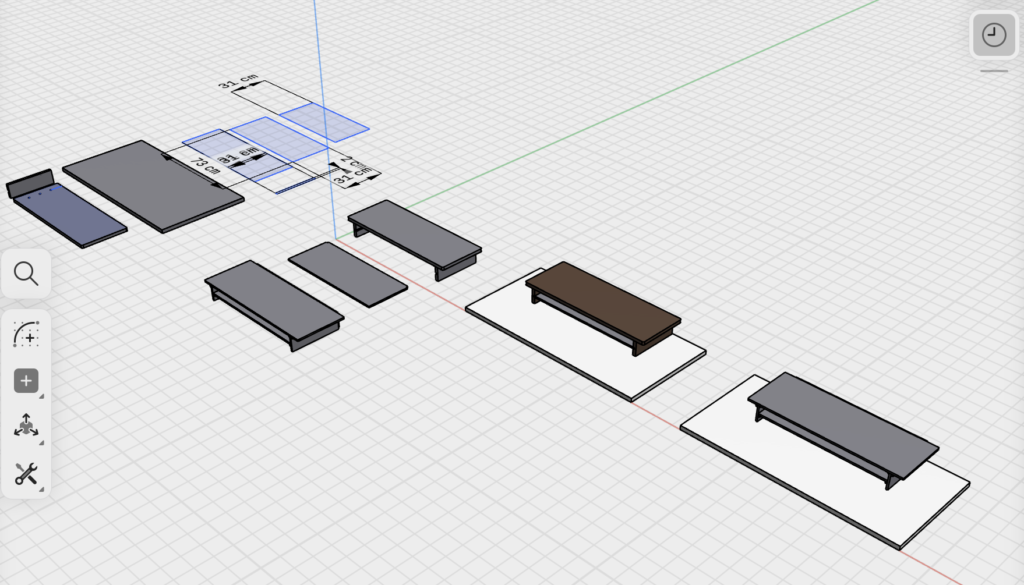
3D view of the same Shapr3D project, including basic materials and form exploration.
My pop ended up building it.
I had expected we would build it together, but when I visited my grandparents, he showed me the finished piece. It was mostly complete, with a few areas left unstained.
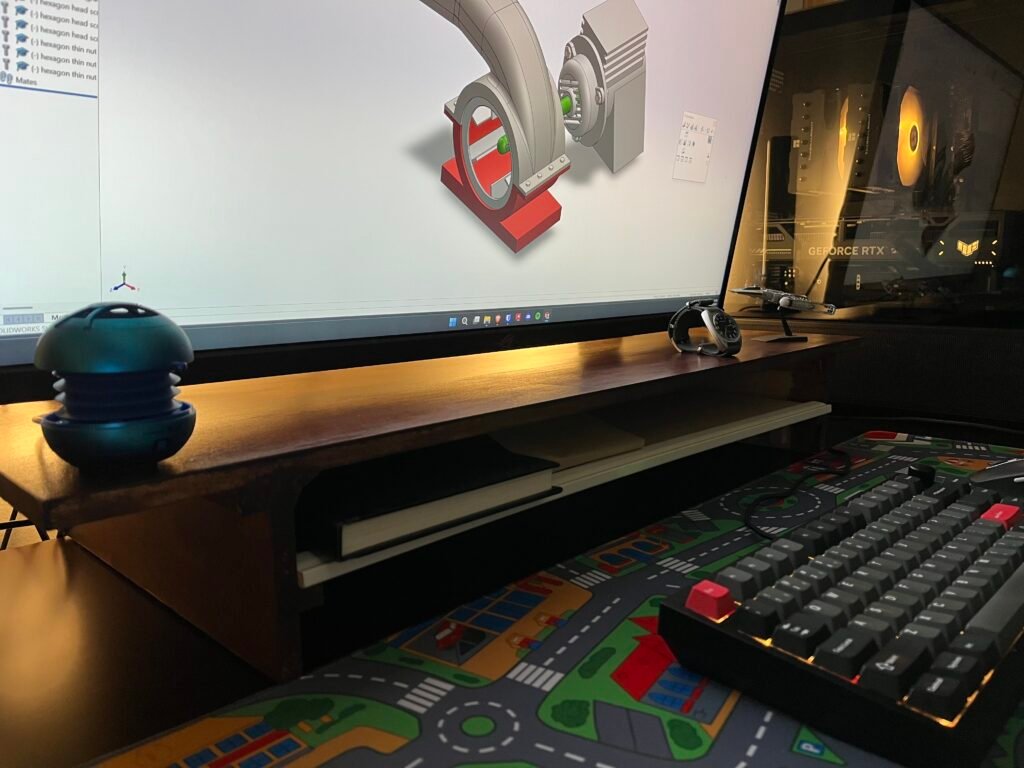
The design is still part of my desk setup today. While I originally designed it to raise my monitor, my setup has changed over time, and I now use it to organise everyday items on my desk.
Monitor riser designed in CAD and built for my desk setup.
This project changed how I saw CAD. It wasn’t just digital modelling, but a way to create something real.
If you’re interested in how I approach physical builds and restoration projects, I’ve documented a similar process here.
Learning AutoCAD for 2D Drafting (Engineering Standards)
My advanced diploma allowed my learning to become more structured.
We focused on 2D technical drawings in AutoCAD, and we were given structured exercises with instructions and explanations for each tool. This helped me understand both how to draw and follow Australian engineering standards.
Compared to my earlier experience, this was more about precision, accuracy, and consistency, which is something that applied across all my technical work.
Learning SolidWorks for 3D Modelling (Student Workflow)
We moved into 3D CAD using SolidWorks in the following semester.
Before classes started, I installed the software and used YouTube tutorials to learn the basics. I also picked up workflow improvements early, such as:
Entering dimensions while sketching instead of after
Using mouse gestures for faster navigation
Pinning commonly used tools
As a result of this preparation, I was able to begin my first assignment immediately and work more efficiently from the start.
This same approach — learning tools early and applying them quickly — is something I carry across all my work, including both engineering and creative projects.
Applying CAD Skills: CO₂ F1 Car Design Project
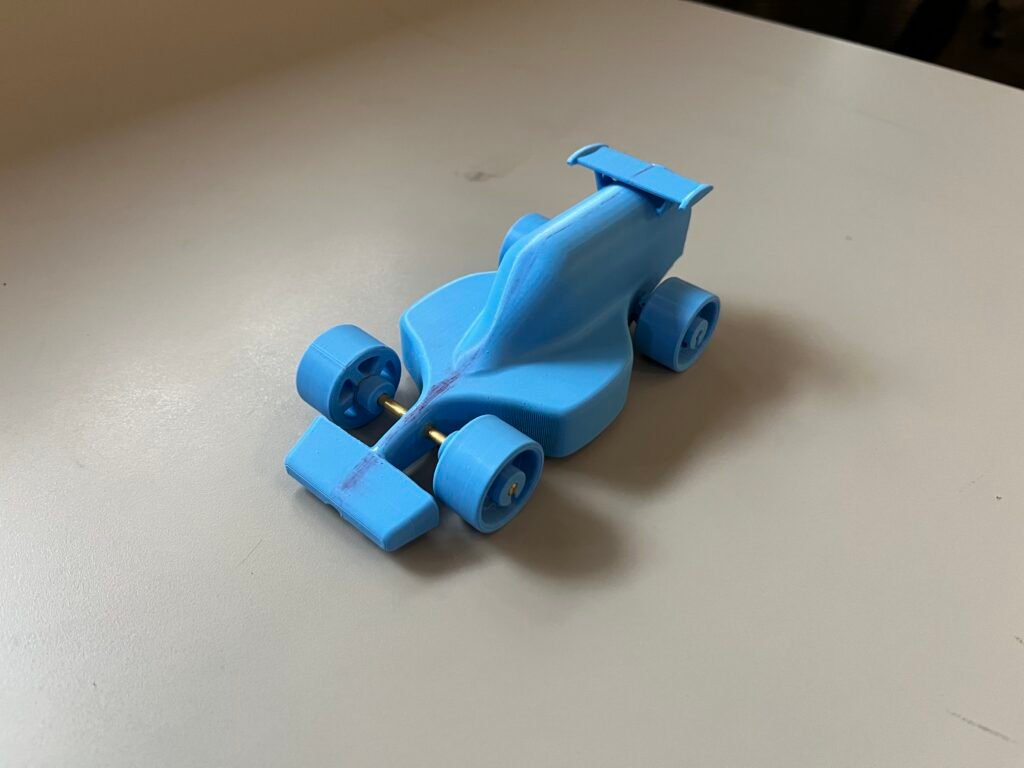
One of our class group projects involved designing a miniature CO₂-powered F1 car.
We were given a tutorial to follow, then told to modify the design. Instead of making minor changes, I redesigned key parts, especially the sidepods, using splines and custom shapes rather than the basic shapes from the tutorial.
I also changed the front and rear aerofoils significantly.
My experience with Adobe software in high school (Photoshop and Illustrator) helped here. The pen tool works similarly to splines in CAD, which made using the tool more intuitive.
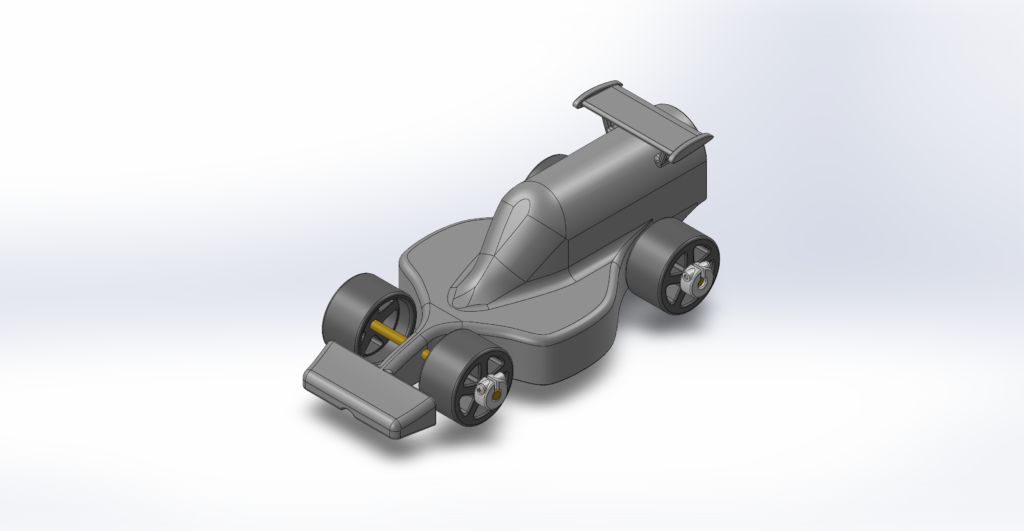
Final iteration of my CO₂ F1 car design in SolidWorks, featuring custom spline-based geometry.
Tips for Learning CAD Faster (Beginner to Intermediate)
There were a few things that made the biggest difference in how I learned CAD:
Start early, even if it’s unstructured
Focus on building real projects
Learn workflow shortcuts as soon as possible
Transfer skills from other software (e.g. Adobe → CAD)
If you’re just starting out, I’d recommend focusing on small, practical builds.
From Beginner CAD to Real Engineering Applications
What started as experimenting with CAD on an iPad has developed into practical engineering skills.
By learning CAD, I’ve been able to move from simple models to real-world projects where I combine design, problem-solving, and manufacturing.
It’s now a core part of how I approach engineering and something I continue to build on.
If you want to see how this fits into my broader work, you can explore all my projects here.